Thumbnails
Thumbnail File Size Optimizer — Stay Under 2 MB, Keep Quality
Compress and optimize any thumbnail to stay under YouTube's 2 MB limit without visible quality loss. Free, in-browser, with live size and quality controls.
Thumbnail File Size Optimizer
Re-encode any image to a YouTube-friendly size and quality — and cut file size dramatically, right in your browser.
Introduction
YouTube caps thumbnails at 2 MB, and that limit bites in two different ways. Upload a file too large and the platform rejects it outright; upload one near the edge and it gets recompressed anyway, which can introduce artifacts you never approved. Meanwhile, creators who over-compress to stay safe end up with soft, mushy thumbnails that damage click-through. The goal is to hit the sweet spot: a file comfortably under 2 MB that still looks sharp in the feed. The Thumbix Thumbnail File Size Optimizer makes that exact trade-off manageable. Upload your thumbnail, watch the live file-size readout as you adjust quality, and export a version that passes YouTube's limit while holding on to the detail that makes the image crisp.
How to use Thumbnail File Size Optimizer
Open the tool
Go to thumbix.site and open Thumbnail File Size Optimizer.
Upload your thumbnail
Drop a file or paste an image URL.
Read the starting size
See how far you are from the 2 MB cap.
Resize if needed
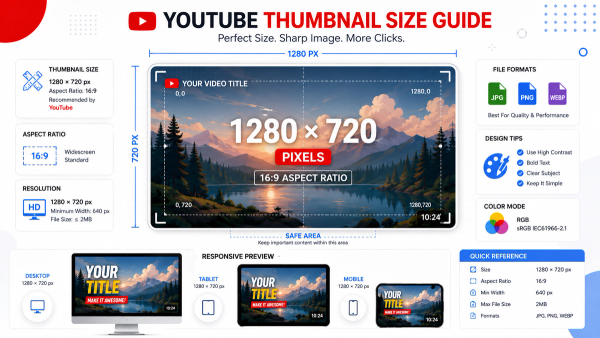
Scale large canvases down to 1280×720.
Balance quality and size
Use the slider to hit your target weight.
Export and upload
Confirm the preview, then publish the optimized file.
What Is This Tool?
The Thumbnail File Size Optimizer loads an image in your browser, shows its current file size, and lets you compress or resize it to land safely under YouTube's 2 MB upload limit.
Unlike a one-click compressor that blindly destroys quality, this tool gives you a live quality control so you can watch the trade-off between file size and visual sharpness as you adjust it.
Why Use This Tool?
- YouTube rejects thumbnails over 2 MB — the optimizer keeps every export safely under the cap.
- Over-compression is the other failure mode — the tool helps you keep quality while shrinking size.
- Fast-loading thumbnails show up sooner in the feed, which helps on slow connections.
- You see the trade-off live instead of guessing at compression settings blind.
- Everything runs in your browser, so original designs never leave your device.
Who Should Use This Tool?
- Creators who design detailed, colorful thumbnails that routinely exceed YouTube's limit.
- Editors who export from design tools at default quality and discover oversized files at upload time.
- Teams uploading many videos that want a repeatable optimization step in the pipeline.
- Anyone using 4K-resolution artwork for thumbnails who needs it compressed to upload size.
- Creators with slow upload connections who want smaller files that push faster.
How Does It Work?
- You upload an image or paste a URL, and the tool reads its dimensions and current file size.
- It applies JPEG compression with a quality slider so you control the trade-off.
- It optionally resizes the image toward 1280×720, which is the biggest single size reduction.
- It shows a live file-size readout and a preview so you see quality and weight together.
- It exports the optimized file when you are happy with the balance.
Why 2 MB Is the Target
YouTube's thumbnail upload limit is 2 MB, and respecting it matters for two reasons. First, practicality: an oversized file is rejected, and a file right at the edge can be recompressed by the platform in ways you did not design for. Second, performance: thumbnails load with every impression of your video, and a heavy file adds latency in the feed on mobile connections. A thumbnail that loads in a fraction of a second is more likely to be seen — and clicked — than one that flickers in late. Optimizing toward a target like 800 KB to 1.5 MB gives you a comfortable buffer below the cap while keeping the file fast.
The 2 MB limit is a ceiling, not a target. The best thumbnails sit comfortably under it with quality intact — big enough to be sharp, small enough to load instantly.
Real-World Use Cases
- The rejected upload. A creator's detailed thumbnail comes in at 3.1 MB and YouTube refuses it — the optimizer brings it to 1.2 MB with no visible loss.
- The detailed design. A gaming thumbnail full of texture and effects lands near the limit, so the creator trims it to 900 KB before uploading.
- The 4K source. A designer exports a 3840×2160 thumbnail by mistake — the optimizer resizes to 1280×720 and the file drops to a fraction of its size.
- The slow connection. A creator uploads from a limited mobile plan and compresses thumbnails to keep transfers quick without wrecking quality.
Step-by-Step Optimization
- Step 1 — Upload your thumbnail and read its starting file size.
- Step 2 — Resize to 1280×720 if your source is larger — the biggest win for both size and quality.
- Step 3 — Adjust the quality slider while watching the size readout.
- Step 4 — Find the highest quality that lands under your size target.
- Step 5 — Check the preview at thumbnail scale to confirm no visible artifacts.
- Step 6 — Export and upload the optimized file.
Best Practices
- Resize before you compress — shrinking a large canvas does far more than quality does.
- Start high and step down — set a high quality, then lower it only until you hit your size target.
- Keep a comfortable buffer — targeting around 1.5 MB or below leaves room for YouTube's recompression.
- Check the preview at feed size, not full size — artifacts are easier to see when the image is scaled down.
Edge Cases and Gotchas
- Flat, single-color designs compress to tiny sizes at high quality — complex, textured images need more attention.
- PNG sources with transparency compress poorly as JPG — flatten them first if transparency is not needed.
- Very small source images may not need compression at all — optimizing them only risks quality loss.
- Shrinking file size never fixes blur — pair this tool with the Blur Checker for the full picture.
Interpreting the Result
- A file well under 2 MB at high quality means you are done — upload it as-is.
- A file near the limit at lower quality means you traded sharpness for size — resize the canvas instead.
- A file that still exceeds the limit after maxing out quality means the canvas is too large — resize to 1280×720.
Frequently Paired Thumbix Workflows
The optimizer is the last stop before upload in a complete thumbnail pipeline.
- Thumbnail Resizer → File Size Optimizer. Get the canvas to 1280×720 first, then fine-tune the file weight.
- Aspect Ratio Checker → File Size Optimizer. Confirm 16:9, then compress the corrected file under the limit.
- Blur Checker → File Size Optimizer. Verify sharpness before compressing, so you never optimize a soft image.
Conclusion
File size is the last technical gate between your thumbnail and YouTube, and it is easy to fail in both directions — over the cap or over-compressed. The Thumbix Thumbnail File Size Optimizer puts the trade-off in your hands with a live size readout and quality control, all in your browser. Pair it with the Thumbnail Resizer for the canvas and the Blur Checker to protect quality.
Common Mistakes to Avoid
- Uploading files over 2 MB and getting rejected at the last step.
- Crushing quality down to 1 MB when a resize would have solved it.
- Ignoring the feed preview and shipping thumbnails with compression artifacts.
- Forgetting that dimensions, not quality, drive most of the file weight.
- Over-optimizing small images that did not need compression in the first place.
Frequently Asked Questions
2 MB — files over the limit are rejected during upload.
Check the actual file weight — high-resolution or detailed images can easily pass 2 MB while looking unremarkable in a preview.
Yes, lower compression quality removes detail — but the tool lets you find the highest quality that still meets your size target.
No — aim for a comfortable buffer around 1.5 MB or below so you keep quality and leave room for recompression.
Dimensions — resizing a large canvas down to 1280×720 reduces file size far more than compression quality does.
No — the image is processed entirely in your browser and never sent to a server.
PNG stores more data than JPG, especially with gradients or detail — converting to optimized JPG usually gives the best size.
Yes — resize to the right canvas first, then use the quality slider to find the highest setting that stays under the limit.
Yes, completely free with no account or sign-up required.
Generally yes — lighter thumbnails transfer faster, which helps viewers on slower connections.
No — compression only affects file size; use the Blur Checker for sharpness problems.
Yes — the compression works on any image, and keeping files light helps Shorts artwork load fast as well.
Get every thumbnail under the limit, sharp
Optimize file size with a live readout and quality slider, keep the detail that earns clicks, and upload with confidence — free and private.
Try the Thumbnail File Size Optimizer